The dish you cooked today might be the most scrumptious meal ever, but when you shoot it you feel the photograph doesn’t do justice. It is often said ‘the eyes taste the food before it reaches the mouth’, and in order to create such visuals, the pillars of lighting and styling are robust. With a few styling and basic lighting tips, up your Instagram game and attract followers. Draw traction. These tips can be used by anyone wanting to start a recipe blog, shoot for a restaurant, or just document what’s cooking in your kitchen this lockdown! So, pick up your camera, and let’s get started!
Light plays a very important role in food photography. No one likes a dimly lit underexposed photo where the dish isn’t clear or one with the yellow tinge that comes from your household ambience lights. Your go-to here is this free source of light; ALWAYS available AND with no charges – SUNLIGHT! Make sunlight your best friend and get set gooo!
Follow These Super Easy Steps And Get The Lighting Going:
1. Where Do I Start?
Start setting up near a large source of sunlight. A window, verandah, or near the balcony.
2. How Do I Set-Up?
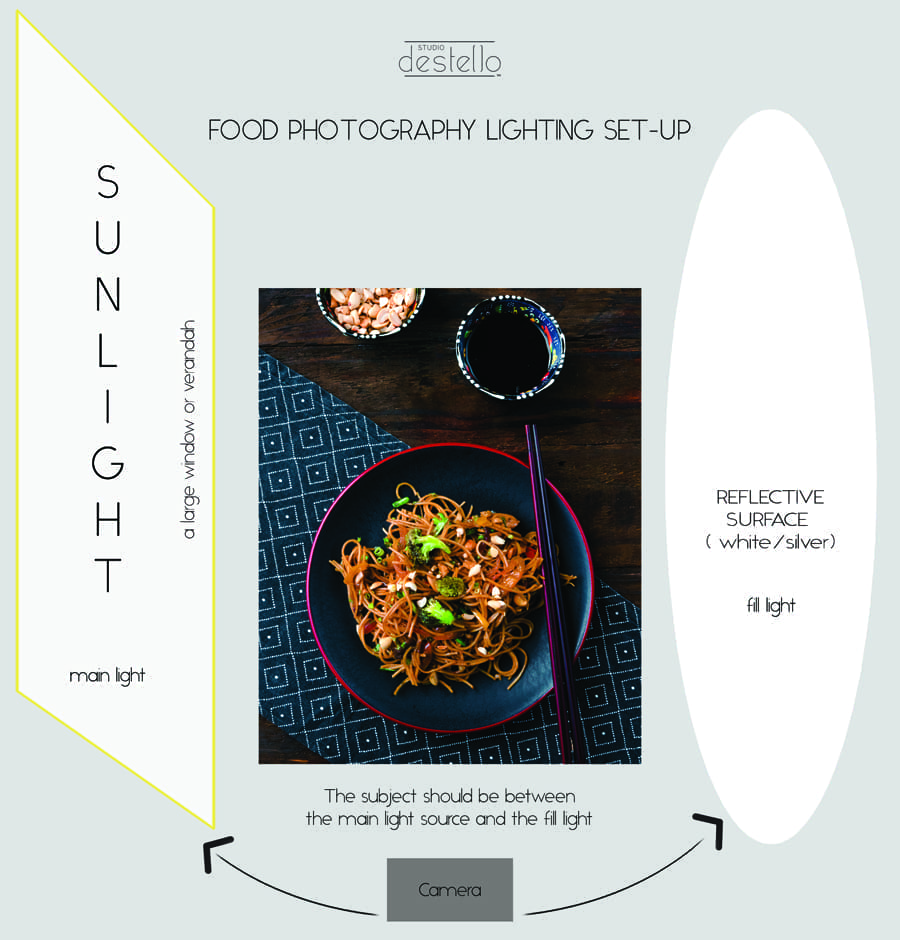
On the opposite side of the light source place a white/silver board or white chart paper. Even a white wall works; basically, anything to bounce the light back at the food, lighting it up from the other side as well.
The dish should be between the main light source (sunlight) and the fill light (the white/silver surface). Refer to the diagram below to understand this better.
3. What Angles Work Best?
A 45-degree angle is most commonly used for food photos. You can also try any angle between 25 to 75 degrees, whichever looks appealing to the eye, or a 90- degree angle i.e. an overhead shot which is a popular angle, often used to fit more elements into the frame.
4. When Should I Shoot?
The golden hour, having very diffused light is the best time to shoot. This is around early morning shortly after sunrise, or before sunset when the sunlight isn’t too strong. But if that’s not convenient you can shoot at any other time during the day by diffusing hard light, using translucent nylon fabric.
Styling is the process of accentuating the primary object being shot using secondary objects in the set-up. So, a quintessential food styling set-up includes your primary dish, being the dish in focus, your background or base where the set-up begins, along with secondary props, such as, small bowls, floral elements, cutlery, fabric etc. which help enhance a scene.
Let’s Understand This Better With 3 Quick Steps!
1. Where Do I Start?
Focus on the primary object, i.e. the dish. Start by placing that on the background, and build around it using secondary props.
2. How Do I Style Around The Main Dish?
Odd numbers of props usually work better, making the scene more aesthetic. So, an arrangement of three, five or seven props work best in a set-up. Try making curves in your set-up using these props; a C or an S works best. This brings about a dimension and helps fill the frame well.
3. The Set-Up Feels A Little Flat, What Else Can I Do?
– Layering always works. Using napkins and mats, to add some fluidity to the image and an inverted tray, chopping board, and baskets to add height.
– Use crockery and cutlery which complement each other. Neutral coloured ceramics and glassware are a good investment as they go with most dishes. You can follow the colour-wheel to work on a palette of complementary colours, in case you’re looking for something more fun.
– Backgrounds play an important role. You can either use tabletops or pretty marble flooring as backgrounds or print A3/A4 sheets with the texture (a marble or wooden look) you’re looking for, as I often do.
And finally, when in doubt, keep the set-up minimal; less is always more!
Now that you have all the steps handy, let’s go through a step-by-step styling guide and see how you too can style and shoot your images.
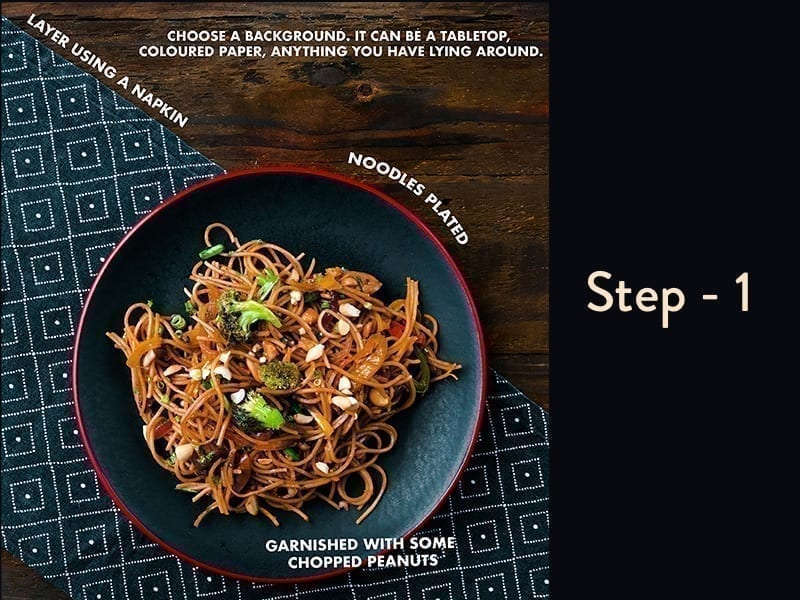
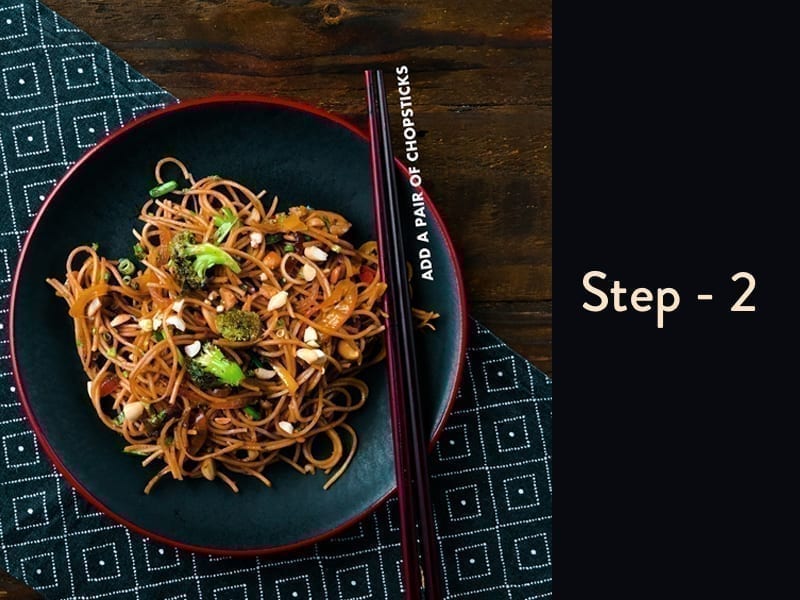
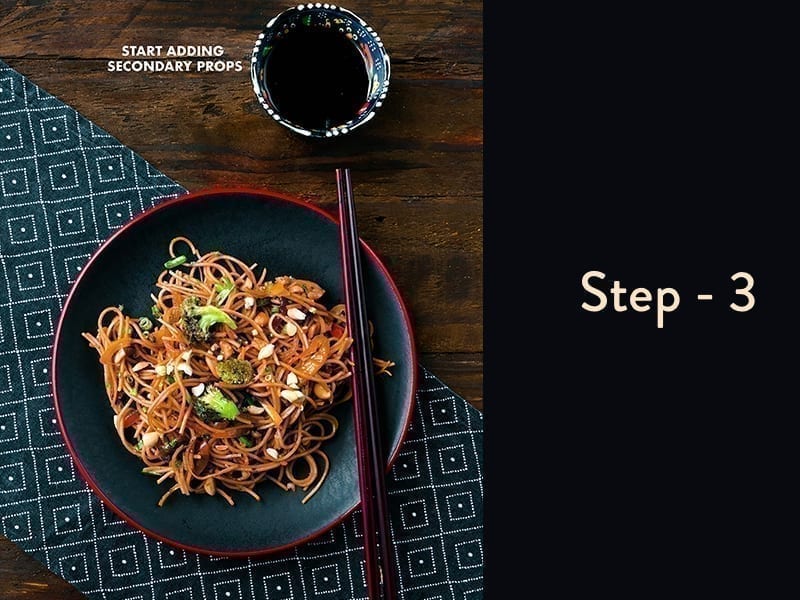
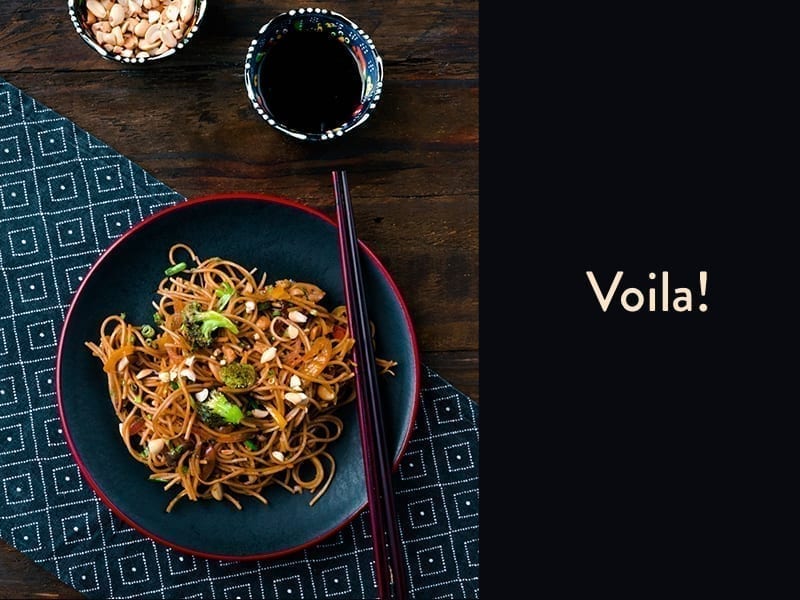
Let me now take you through a few images we shot in natural light, keeping in mind the styling tips already discussed:
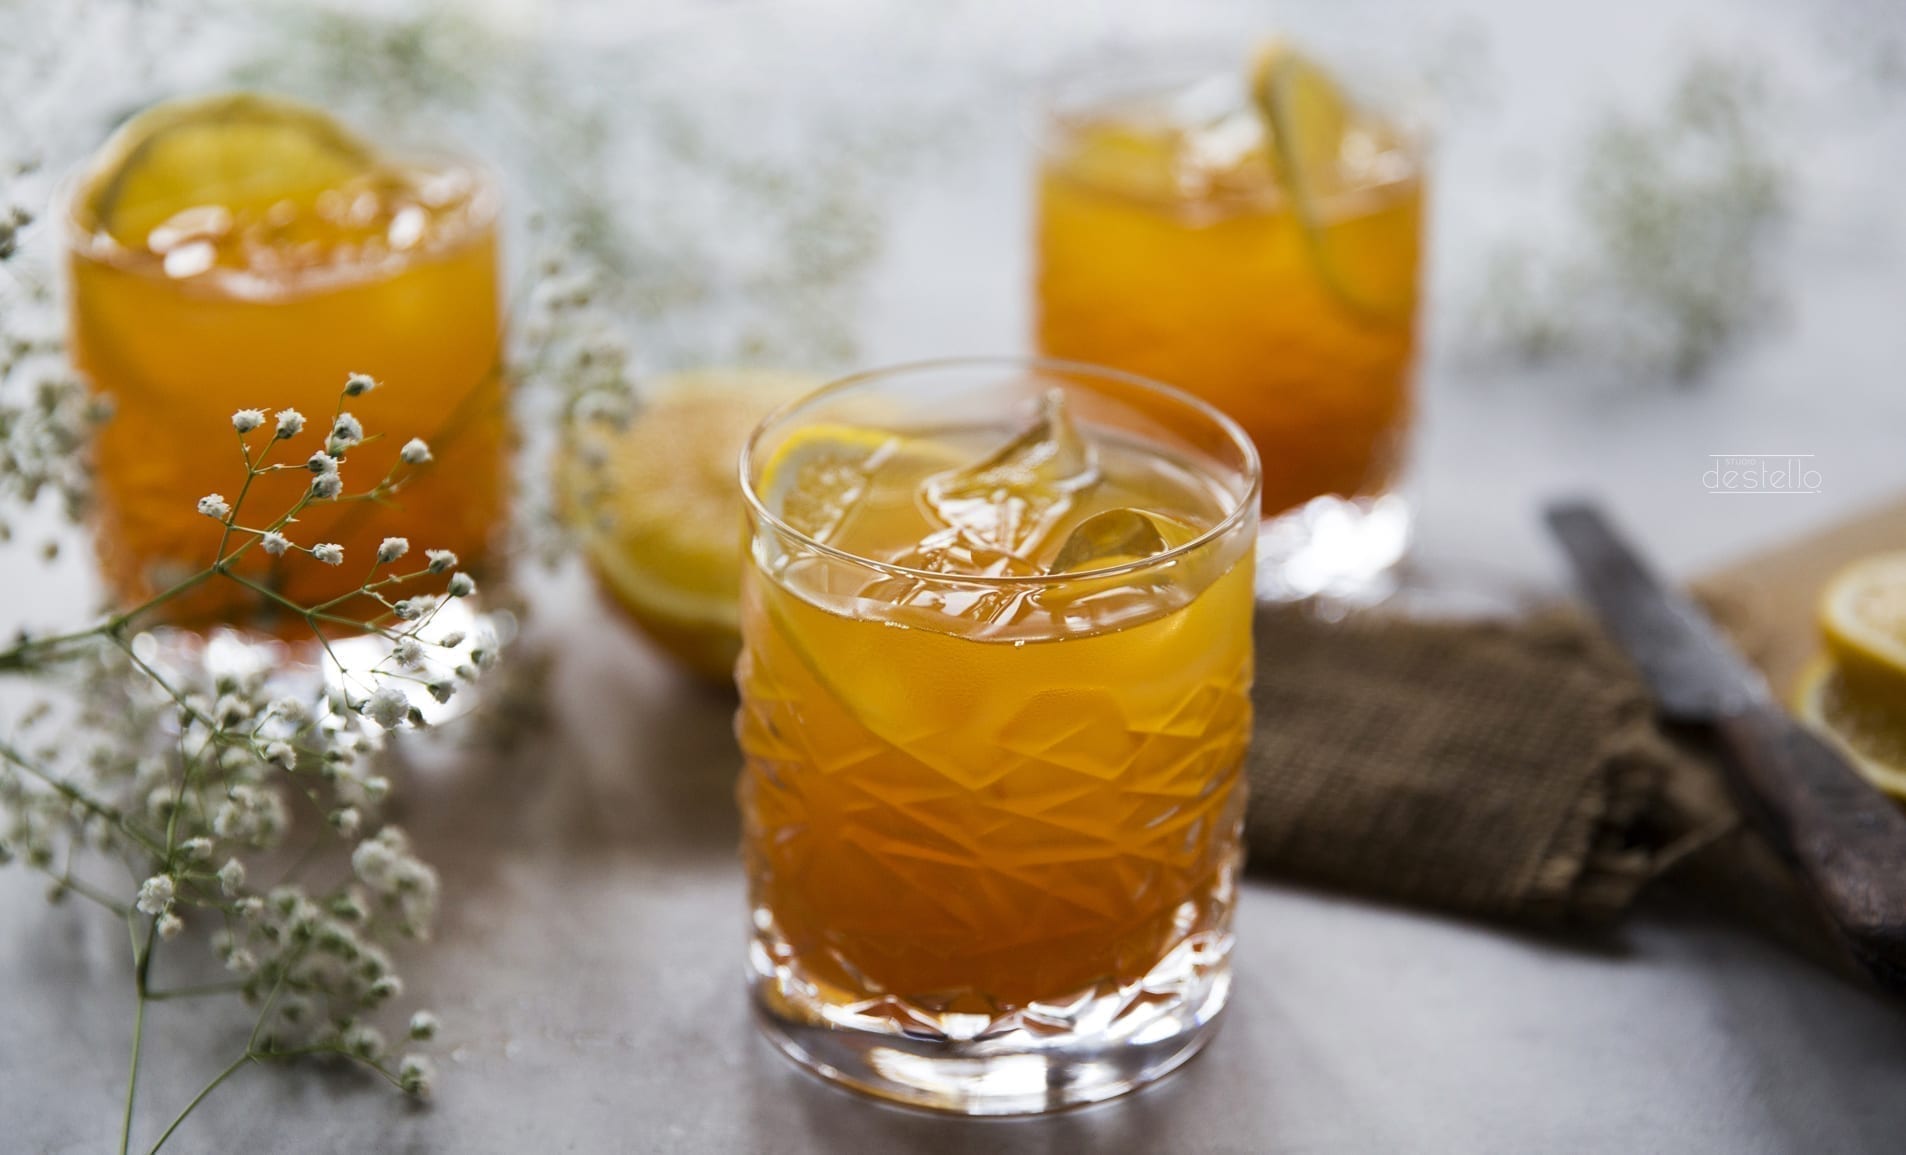
Primary Object: Orange Drink
Secondary Props: Jute (for layering), knife and lime on a chopping board (adding some height).
A floral element giving it a soft summery vibe. The colours of the drink and the lime, along with whites worked out well.
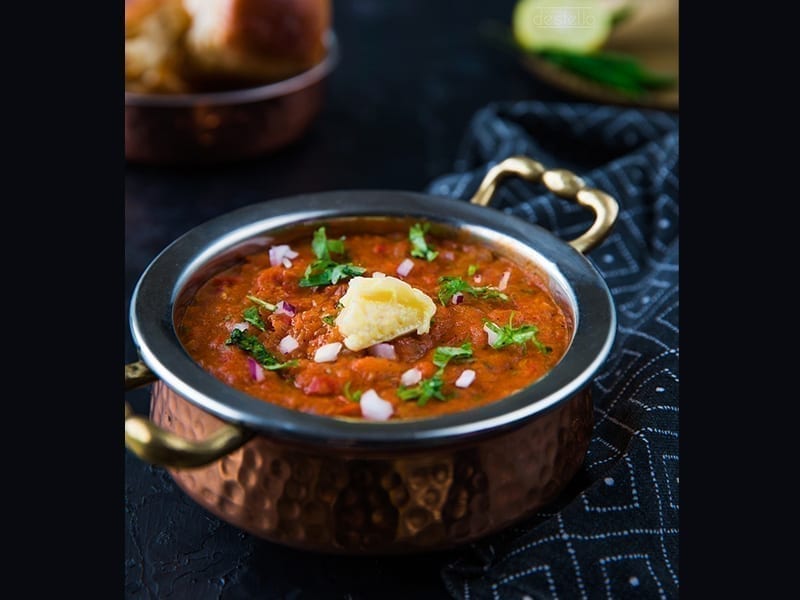
Primary Object: Bhaaji
Secondary Props: The Pav placed behind in a bowl (adding height), a copper plate to the right with some lemon and chilli.
A black napkin added as a supporting element to bring some fluidity and movement to the photo.
Here, the C created by the props, and a 45- degree click worked well for the shot.
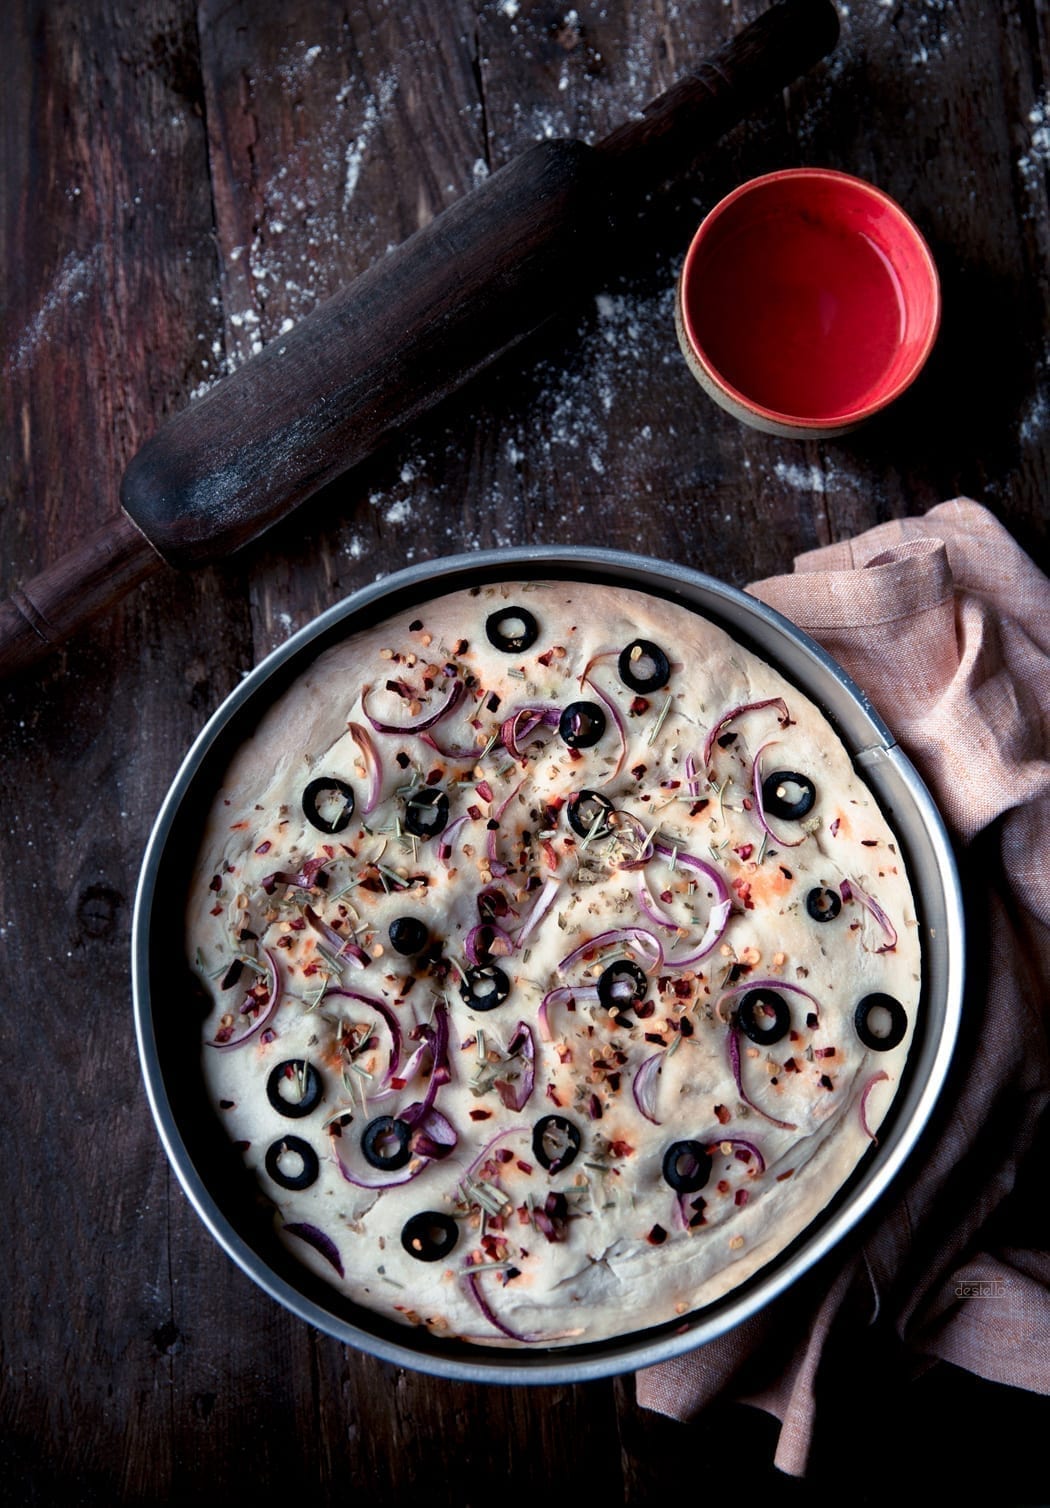
Primary Object: Olive And Onion Focaccia
Secondary Props: A rolling pin, bowl with some oil and a baking tray (adding some height).
A linen fabric placed under the baking tray (for layering).
To give it an in-the-kitchen feel, we threw some flour on our table and shot this at around a 90-degree angle during the golden hour.
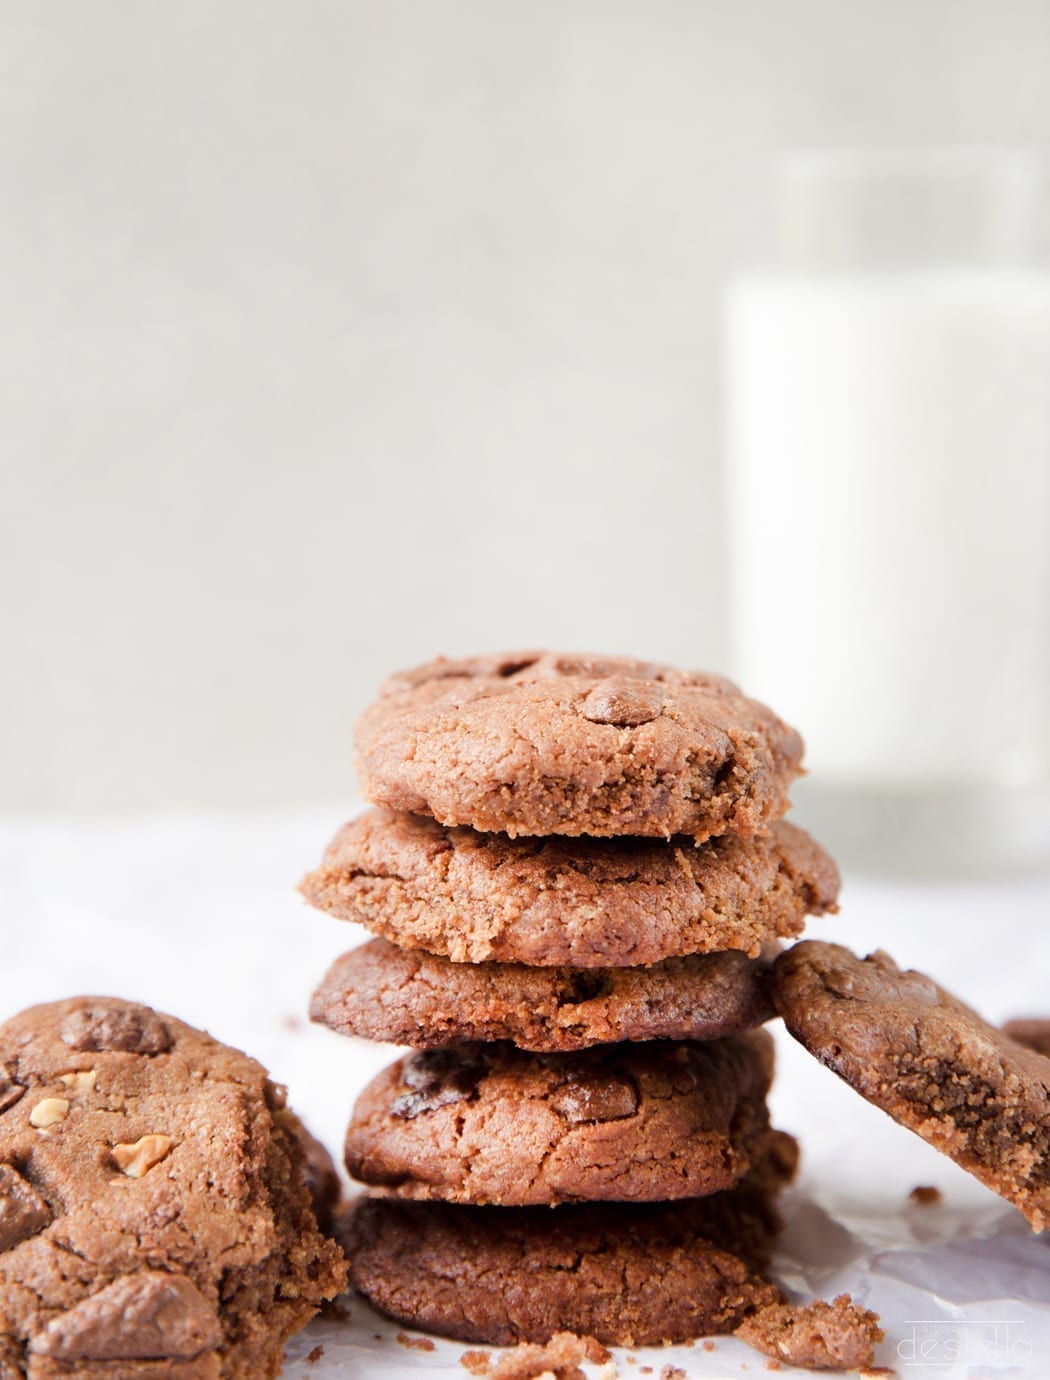
Primary Object: Chocolate Chip Cookies Stacked (Adding Height)
Secondary Props: A tall glass of milk (adding height), some cookies crumbled and scattered around. Some butter paper under the cookies (for layering).
Here, a white wall was used as a backdrop and this was shot around noon using some nylon fabric to diffuse the light.
With these lighting and styling tips, you’re good to go! Practice makes perfect, so don’t be disheartened if your first shot doesn’t come out well. Be patient, and try changing things around till you’re fully satisfied. Create many many many images and make your Instagram feed a visual treat!
“In this age, where change is inevitable and creation ubiquitous, we believe only the best should survive. We are mindful of the same when we photograph.“
– Siddhika Jatia, Creative Director & Photographer
Feel free to share your images with us @studiodestello on Instagram. Hope you enjoyed this and do feel free to get in touch for more tips and techniques. Until then, stay safe and happy shooting!
(Written & Edited by Siddhika Jatia
Siddhika Jatia is a photographer heading Studio Destello, in Kolkata, India. We started off in 2018 and initially specialised only in culinary shoots. Over the course of the last few years we have built an eclectic portfolio of work having worked across various sectors, each with their own talented entrepreneurs who come back to us for their continued brand photography needs, a feat we’re definitely proud to share.)

