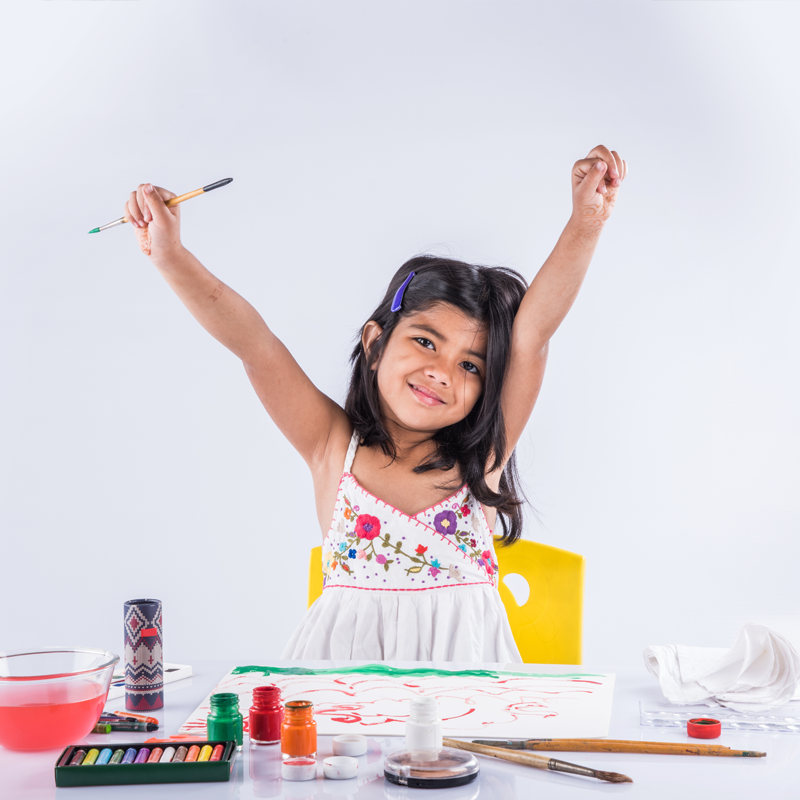
Keeping the kids busy during school holidays has been a constant challenge faced by parents. Unfortunately, the pandemic has made online classes a norm in addition to zero outdoor playtime, giving the kids ample time at hand and very little to do. Now with schools expected to open soon, parents can encourage the kids to make DIY crafts to keep the little ones occupied while stuck at home.
Finding engaging DIY projects for the children ensures that the children have brand new things to take to school without the parents having to shell out too much money. Just buy them some basic supplies (or let them have the stuff that is already lying at home) and you will have a happy child who has school supplies meeting the exact same colour, design and character of his/her choice. These DIY ideas also serve as a constructive distraction from screens and video games that have become the sole source of entertainment for children during the pandemic.
10 Easy DIY Arts and Crafts Ideas For Children
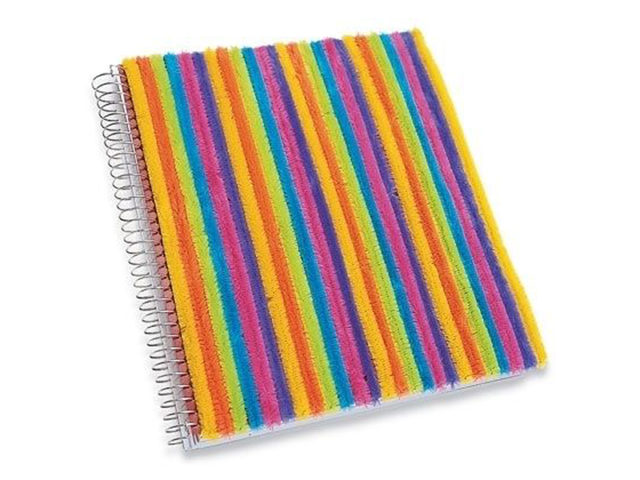
1. Pipe Cleaner Notebook

Using the same kind of notebooks can get boring and monotonous. Allow your kids to give their notebooks a quick and quirky makeover with this simple and easy DIY notebook idea.
Materials Required:
- Notebook
- Pipe cleaners
- Glue
- Scissors
Method:
- Start by cutting the pipe cleaners to fit the length of the notebook.
- Apply glue all over the top cover of the notebook.
- Stick the pipe cleaners on the notebook in a striped pattern.
- Leave the notebook to dry.
2. DIY Binder Clips
Binder clips are essential for homework and worksheet organization. The children can now create their own unique clips by making cute faces on their binder clips using this method.
Materials Required:
- Binder clips
- Pompoms
- Velvet paper sheet
- Craft eye stickers
- Glue
- Scissors
Method:
- Stick the velvet paper sheet on the binder clips to cover the black part.
- Stick the craft eye stickers on top of the velvet paper.
- Stick pom-poms above the eyes.
3. Straw Pencil Holder
This DIY project is a perfect example of creating something valuable out of waste. Put the empty toilet rolls and used straws to make a colourful pencil holder that will make the children’s desk look neat and attractive. This holder is a perfect example of saving the planet using creativity.
Materials Required:
- Empty toilet paper roll
- Straws
- Glue
- Scissors
Method:
- Cut the straws to fit the length of the toilet paper roll.
- Apply glue on a small section of the toilet roll.
- Stick the straws to cover the section.
- Continue the process until you have covered the entire circumference of the toilet roll.
- Let the pencil holder dry.
4. Rubber Band Sanitizer Holder
Keeping a sanitizer handy is the need of the hour. This easy to make sanitizer holder requires only rubber bands and is so simple that kids of any age can quickly make it.
Materials Required:
- Rubber bands
- Sanitizer bottle
Method:
- Start by holding one rubber band and making a loop out of it.
- Pass another rubber band through the loop.
- Continue this process by adding more rubber bands to make a string of rubber bands.
- Starting from the cap of the sanitizer bottle, wrap the rubber band string to cover the surface of the sanitizer bottle.
- Create a hanging loop for the top of the bottle using the same method.
5. Washi Tape Reusable Snack Bags
When it comes to craft ideas, there is probably nothing as quick but satisfying as creating a unique snack bag. This project gives everyone a break from the boring transparent snack bags children take to school. Your children can use their creativity to come up with unusual designs to decorate their bags.
Materials Required:
- Reusable ziploc snack bag
- Colourful washi tape
- Scissors
Method:
- Place the reusable ziploc snack bag flat on any surface.
- Decide on the pattern you wish to create with the washi tape. You can choose to use one washi tape all over the bag or create a pattern using multiple tapes.
- Stick the tape on the snack bags in the desired pattern.
6. Beaded Mask Chain
This mask chain is amongst the easy crafts for kids which not only look cute but also help in keeping them safe and protected. Prevent your children from dropping and soiling their masks by having them create these cute and useful mask chains. The children can choose to use alphabet beads and make customised mask chains with their names on them.
Materials Required:
- Nylon thread
- Clasp set
- Beads
- Scissors
Method:
- Pass the nylon thread through the hole in one of the clasps and tie a knot to secure it.
- Pass the beads through the nylon thread in the desired pattern.
- Once you reach the desired length of the mask chain, tie the end of the nylon chain to the other clasp.
- Cut the excess nylon thread.
7. Stationery Storage Caddy
With school starting, the homework is bound to pile and make the study desk look like a mess. This attractive storage caddy can help in keeping all the stationery in designated cans, making it look pretty and also be easily accessible when needed.
Materials Required:
- Round cake board
- Empty tin cans
- Paints
- Paintbrush
- Glue
Method:
- Place the cake board on a flat surface.
- Using glue, stick the clean and empty tin cans on top of the cake board in the desired pattern.
- Use the paintbrush and paints to colour the cake board as well as the cans.
8. Felt Bookmarks
These are simple and quick to make, using these bookmarks might even entice your kids to read books. They can even put their creative heads to use and make customised bookmarks for their particular books with different colours and themes.
Materials Required:
- Ice cream sticks
- Buttons
- Felt cloth sheet
- Paint
- Paintbrush
- Glue
- Scissors
Method:
- Paint the ice cream stick in a colour of your choice.
- Wait for the paint to dry.
- Cut flower shapes of different sizes out of the felt cloth sheet.
- Stick the flowers on top of one another, starting from the biggest.
- Stick a colourful button on top of the prepared felt flower.
- Stick the flower on top of the ice cream stick.
9. Rainbow Crayons
When looking for crafts to do at home, don’t forget about the old box of wax crayons that has been vying for your attention. This method of melting old crayons to create new rainbow ones is a great way for the children to learn about mixing colours and creating unusual colour combinations.
Materials Required:
- Used crayons
- Muffin tray
Method:
- Peel off any paper from the used crayons.
- Break the crayons into small pieces and place them inside a muffin tray.
- Ensure to put more than one colour of crayons in each muffin slot for a rainbow crayon.
- Place the muffin tray inside the oven at 110 degrees celsius for 20 minutes.
- Carefully remove the melted crayons and let them cool down.
10. DIY Binder Cover
Storage and organization are often looked at as the most boring chores by most kids. Creating colourful binder covers gives the students an opportunity to create binders that are attractive and useful at the same time.
Materials Required:
- Binders
- Card paper/wrapping paper
- Markers
- Scissors
Method:
- Measure the width of the binder and cut the card paper or wrapping paper to fit the size.
- Use the markers to make designs on the paper. You may also use stickers of your choice.
- Write the name of the subject on the paper.
- Insert the prepared card/wrapping paper in the transparent slot provided on the binder.
Getting children involved in DIY art and craft projects has numerous benefits. These projects provide the children with an opportunity to make constructive use of their time, create unique back to school supplies and enhance their creative skills. Indulging in creative arts improves hand-eye coordination in younger children and helps in increasing their attention span. Parents with some spare time can join the children in art and craft activities for family bonding and stress relief.

